We recently wrote an article on Style Forum discussing a few particular processes in shoe making. The original article can be seen here.
Goodyear-welt construction consists of many steps which can vary depending on the footwear being made as well as on the materials. In this article we want to touch on one of the first processes and why we feel it’s so important.
First and foremost, every factory or brand has their internal standards and direction. This, combined with the material and construction, creates a guideline for manufacturing. In welted footwear, one side of the spectrum would be bespoke and the other would be volume production. Given the type of shoes we are aspiring to make, we try to ask ourselves, what would a bespoke maker do? The answer is usually a basic, proven method. However, bespoke methods will require more time and sometimes revolves around materials that aren’t used in volume production. If we want to make a great product and set a precedent for each department, this helps us look in the right direction.

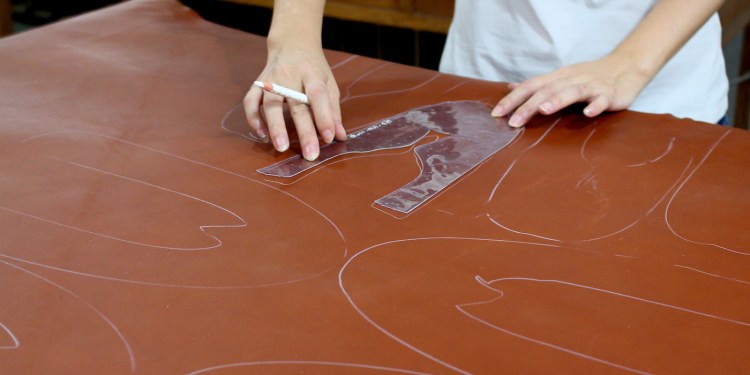
Nesting patterns onto the leather is the first step to making the shoe or boot upper and is one of the most important. “Nesting” is when a person methodically maps out the upper patterns onto the leather hide. This allows the person to closely inspect the article and avoid any blemishes while utilizing the majority of the hide. It’s one of the most critical steps for a few reasons. For a factory, this is where money can be made or lost. It is a difficult job because there isn’t a straight-forward Standard Operating Procedure, and you may not know the result of a decision made until the shoe is nearly finished. For example, a questionable piece of leather may look okay once the shoe is lasted as the upper is supported. Once you remove the last, the upper may show wrinkling or other issues which were not apparent.

Every leather acts differently when it comes to aesthetics and performance. The pattern being used also plays a large factor, as some are broken in to multiple pieces while others can be a large, single pattern, which can make it difficult to find a suitable area on the hide. Even when sourcing leather from world-renowned tanneries, properly cutting the pattern (including direction) is critical. The majority of high-end footwear leathers are tanned with aniline dyes which purposely reveal the natural characteristics of the leather. While the transparency gives the leather a certain depth and character, it also exposes the blemishes such as veins or scars. It’s quite common to find subtle lines throughout the best areas of the article which tend to be near the rear-end of the animal, just beside the backbone. This part of the animal’s skin has endured less movement and encounters less everyday abuse such as cuts and scrapes.
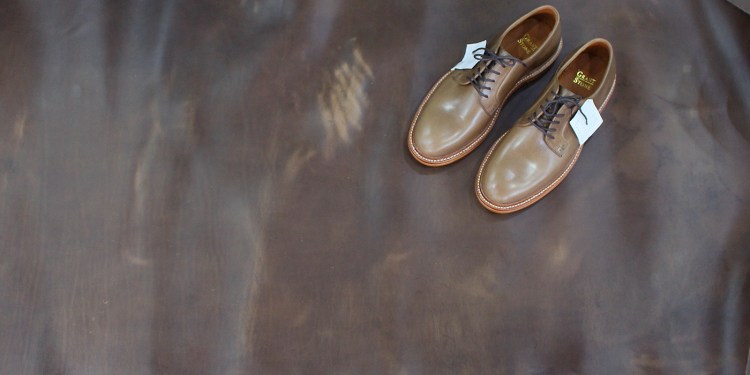
Pictured below is a cow hide used on casual footwear which has a high wax and oil content. This article has an exaggerated “pull-up” effect which means the oils and waxes inside the article are able to move around freely. Not only does this give the article a lot of character, this will keep the article hydrated over the years when enduring water and other elements. When this article is pulled over the last, the oils and waxes are drawn out of the article highlighting the base color of the leather. This type of leather (especially in lighter colors) can be quite difficult because some blemishes that were not visible due to the oils will appear after lasting.

When mapping out the leather, cutting an extra half pair from a hide will improve yields but if the shoe is pulled aside later on in the stitching or lasting department due to quality issues such as excessive wrinkling or blemishes, the loss is much greater than just avoiding that part of the hide to begin with.
The standard comes down to the type of footwear being made, the cost and what the consumer expects. A bespoke maker might only cut one pair of shoes from an entire hide, while a volume manufacturer with very competitive pricing will try to use every last bit of the article. We have to find a middle ground, but tend be more cautious with our cutting, as we understand that there will be fewer issues later in the process and end product will be sound, as our customer expects.
Marks such as scars can’t be used on this type of footwear, so they are avoided altogether. If we had to summarize our cutting standard, we might say that we focus more on the overall grain structure. While most of the loose grain is near the edges of the article or the belly area, loose grain can also be found in the center of the article. To avoid using these areas, the person nesting has to inspect the area, lightly moving or flexing the leather to see how it reacts. This will give an indication of how the leather will look if it’s flexed during the make process or on the finished shoe. Another way to check is not only on the surface of the leather, but the flesh side. The below photo shows the grain side and flesh side of a prime area (A), versus the belly area (B). It is clear how the belly area has wrinkles on the surface and how it translates to loose fibers on the flesh side. While loose grain is usually considered a cosmetic concern, it can affect the integrity of the shoe as loose fibers are not as strong.

If there is an area we might be more lenient when cutting, it might be color variation within a pair. While it isn’t desirable for the right and left shoe to be two different hues, minimal color variation does not cause performance concerns and usually can be alleviated with hand stains and creams in the finishing room. Using these methods to finish the leather allows for deeper color while not concealing the natural grain or base colors. Since these leathers are not pigmented, there are multiple shades of color within an article and they will continue to change overtime due to the outside elements and wear.
Below is a photo of a new longwing being broken in, flexing the vamp. After flexing this shoe one time, it is clear there will be a clean vamp break and the leather has a tight grain. While the colors and other attributes may change overtime with wear, the vamp break will stay for the life of the shoe.


